
Clair Mieluk

Clair Mieluk

Monday, 17 February 2014

Chocolate pavlova...


Whisk 1 & 1/2 cups of egg whites with 2 & 1/2 cups of white sugar on high speed for 10-15 minutes, until sugar granules have completely dissolved and mixture holds a stiff peak.


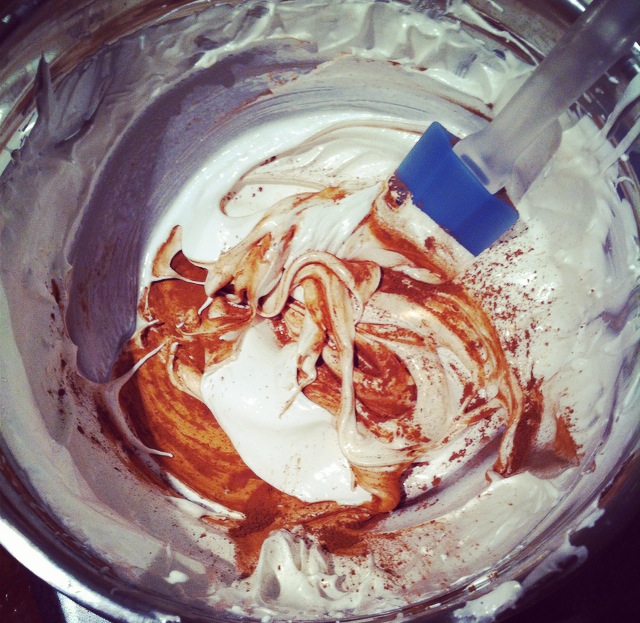
Pour the mixture out onto a parchment lined flat baking tray, keeping it about 2 inches high and sift 1 tablespoon of cocoa powder over the top, swirling it into the mixture with a skewer.

Bake in the middle of the oven until the mixture has formed a crust on the outside and does not wobble when you slightly shake the tray. It will cook faster in a fan forced oven compared to an electric oven so watching it change and cook is much better than putting a time on it...


Once it has cooled, serve fresh with whipped cream, fresh blood orange segments and drizzled dark chocolate with some toasted sliced almonds on top!


> <
O


Enjoy an Australian classic with a gooey chocolatey twist!

Friday, 7 February 2014

Coconut Cake Pops...

If you've got a cake that's a little overcooked, dry, needs to be eaten stat or you're looking for an easy dessert, then this is your perfect solution.
These guys don't require any cooking once you have some cake you need to use, or if like me you have bundles in your freezer!


To start, all you need is about 3 cups of cake crumbs*, 1/4 cup of melted chocolate and 1/4 cup of coconut cream. Mix it all together in a bowl with your hands, making sure there are no cake chunks and the mixture is quite moist. Depending on the dryness of your cake you may feel the need to add some more coconut cream to achieve this consistency.


Wet you hands a little and roll a tablespoon of mixture into a ball, placing on a greaseproof lined plate. Repeat this step until you have run out of mixture, then place them into the freezer for at least an hour.

After the cakes are frozen on the outside, melt some white chocolate and work quickly to completely cover each cake pop in the chocolate. The cold cake surface makes them easier to work with and helps the chocolate set quickly.

Nothing left to do once the chocolate has set but to pop them in your mouth... one by one until they are gone :)


*For this recipe I used a coconut buttercream cake which was basically a butter cake with shredded coconut mixed through. You can use any cake you have on hand and add some shredded coconut into the mixing bowl to achieve the same effect.

Sunday, 26 January 2014

Salted Caramel...


I was testing out a blind baked pastry recipe when these guys just magically happened... and what a magical treat they tuned out to be!

I currently work in a magnificent bakery and thank my lucky stars everyday for the abundance of knowledge and skills that I'm receiving and the wonderful people surrounding it all. The experience has really made me think about how I approach each recipe and understand that it's alright if in your own kitchen something doesn't work the first time, don't ever be afraid to try it again... and again!

While the pastry recipe still needs a bit of work the salted caramel  is so addictive it deserves a mention all of it's own.

You will need:

1 cup of pouring cream
60g of salted butter
1 teaspoon of fleur de sel (salt flakes will do)
1 cup of brown sugar
1/2 cup of white sugar
1/2 cup of water
1 teaspoon of vanilla essence

Start by heating the cream and butter together in a saucepan until they have melted, then set aside.

Combine the sugars, water and vanilla essence in a separate saucepan and bring to the boil on a high heat for about 10 minutes, just until sugar granules completely dissolve and the mixture starts to change colour slightly (pic 1).

1. 2.

Take this off the heat and whisk in the cream mixture, followed by the fleur de sel, before placing back on a low heat for another 10 minutes to simmer (pic 2).

You will notice that the mixture is ready when it starts to coat the back of a wooden spoon in a deliciously silky glaze. Leave to cool slightly before using it in a recipe.

I poured and set some salted caramel in pre-baked tart cases then covered the top with a layer of dark chocolate to create a decadent little tart, the perfect accompaniment to... well anything really!


Wednesday, 8 January 2014

Champagne rose cupcakes...

The perfect celebratory cake for any special occasion, champagne and cake all rolled into one! 

You will need:
150g of softened butter
1 and 1/2 cups of caster sugar
3 eggs
3 cups of self raising flour
1 cup of champagne
1 tsp of vanilla extract

Preheat the oven to 180oC and line either a 24 mini cupcake tin or 12 regular cupcake tin with paper casings.

Cream the butter and sugar with an electric mixer until pale and fluffy. Add the eggs one at a time, then and the vanilla extract and beat until combined.

Turn your electric mixer to low speed and add the champagne and flour in 3 batches, starting with the champagne and alternating between the two. Do not mix it for more than a few minutes as over mixing can make your cakes seem tough and doughy in texture.


Fill each paper casing no more than 3/4 full and pop in the oven for 10-12 minutes.


Once the cakes are cooled, beat 1 cup of sifted icing sugar with 60g of softened butter and 1 tablespoon of champagne to make frosting. You could also add a drop of food colouring at this point if you wish. If you find the consistency is a little too runny, add some extra sifted icing sugar until it stiffens and is easier to work with.


I like to swirl the frosting using the back of a teaspoon so that it looks like a sweet little rose :)


Friday, 13 December 2013

Christmas wreath...

Here's something for anyone who doesn't have the money to spend at the craft store, lacks the ability to sew and perhaps forgot to collect pine cones before the snow set in this year…

All you need is…
Some cardboard - just cut up an old box);
An old book you won't be reading anymore - or in my case can't read as it was written in french;
A large stapler;
A pair of scissors.


Cut the piece of cardboard into a donut shape, mine was about 20cm in diameter. Gently tear pages from the book and curl into a cone shape ready to staple.

Fan the cones around the outer edge of the cardboard, spacing evenly and stapling as you go. Always look back at your work to ensure you are maintaining a circular shape all the way round.


Continue creating rows of paper curls until the desired effect is reached. I went with 3. Then all you have to do is fold the excess paper in the centre through the middle hole and secure with some tape if needed.


H a p p y   H o l i d a y s !

Thursday, 12 December 2013

Coconut frosting...

For whenever you want to get just a little bit fancy with an old favourite:)

Ingredients:
1/2 cup of shredded coconut
2 cups of sifted icing sugar
1/2 tbl spoon of butter at room temperature
1 tbl spoon of thick coconut cream

Method:
1. Toast the shredded coconut in a non-stick pan on a medium heat until it is fragrant and golden (about 4-5mins). Set aside to cool.
2. Combine icing sugar, soft butter and coconut cream in a bowl and beat with an electric mixer until smooth. It should be a nice thick consistency.

Note: I find the consistency of coconut cream varies greatly changing the outcome of your frostings consistency each time. If you find it is too runny, add more sifted icing sugar or alternatively if it is too think and lumpy, add a tiny dash of milk to thin it out.


3. Ice your chosen treat with a spatula or the back of a large spoon. Once the toasted coconut has cooled, sprinkle it over the top for a crunchy coconut hit.


This was the only photo I managed to take of the finished product, it was devoured that quickly!


Saturday, 23 November 2013

Peanut butter dough cookies...


Don't they look and sound oh so yummy?
What if I told you they were completely vegan and gluten free?
It may deter some of you, but if you're the inquisitive type and appreciate better food choices every now and then, I think you will enjoy these straight out of the oven with a cup of your favorite tea!
Process 1 & 1/4 cups of canned chickpeas (rinsed and drained well ), 3 tbsp of natural crunchy peanut butter, 4 tbsp of agave syrup (you can substitute this for honey if you're not vegan), 2 tsp of vanilla extract with 1 tsp of baking soda in a food processor until smooth.

Mix 1 heaped tbsp of cacao powder with 1 tbsp of water until it forms a runny paste and fold through the cookie dough with only a few sweeping motions to create a marbled effect.

Spoon mixture onto a lined baking tray and bake at 180oC for 15 minutes. 

Perfect for a not so naughty night time snack!