Clair Mieluk

Clair Mieluk

Friday, 13 December 2013

Christmas wreath...

Here's something for anyone who doesn't have the money to spend at the craft store, lacks the ability to sew and perhaps forgot to collect pine cones before the snow set in this year…

All you need is…
Some cardboard - just cut up an old box);
An old book you won't be reading anymore - or in my case can't read as it was written in french;
A large stapler;
A pair of scissors.


Cut the piece of cardboard into a donut shape, mine was about 20cm in diameter. Gently tear pages from the book and curl into a cone shape ready to staple.

Fan the cones around the outer edge of the cardboard, spacing evenly and stapling as you go. Always look back at your work to ensure you are maintaining a circular shape all the way round.


Continue creating rows of paper curls until the desired effect is reached. I went with 3. Then all you have to do is fold the excess paper in the centre through the middle hole and secure with some tape if needed.


H a p p y   H o l i d a y s !

Thursday, 12 December 2013

Coconut frosting...

For whenever you want to get just a little bit fancy with an old favourite:)

Ingredients:
1/2 cup of shredded coconut
2 cups of sifted icing sugar
1/2 tbl spoon of butter at room temperature
1 tbl spoon of thick coconut cream

Method:
1. Toast the shredded coconut in a non-stick pan on a medium heat until it is fragrant and golden (about 4-5mins). Set aside to cool.
2. Combine icing sugar, soft butter and coconut cream in a bowl and beat with an electric mixer until smooth. It should be a nice thick consistency.

Note: I find the consistency of coconut cream varies greatly changing the outcome of your frostings consistency each time. If you find it is too runny, add more sifted icing sugar or alternatively if it is too think and lumpy, add a tiny dash of milk to thin it out.


3. Ice your chosen treat with a spatula or the back of a large spoon. Once the toasted coconut has cooled, sprinkle it over the top for a crunchy coconut hit.


This was the only photo I managed to take of the finished product, it was devoured that quickly!


Saturday, 23 November 2013

Peanut butter dough cookies...


Don't they look and sound oh so yummy?
What if I told you they were completely vegan and gluten free?
It may deter some of you, but if you're the inquisitive type and appreciate better food choices every now and then, I think you will enjoy these straight out of the oven with a cup of your favorite tea!
Process 1 & 1/4 cups of canned chickpeas (rinsed and drained well ), 3 tbsp of natural crunchy peanut butter, 4 tbsp of agave syrup (you can substitute this for honey if you're not vegan), 2 tsp of vanilla extract with 1 tsp of baking soda in a food processor until smooth.

Mix 1 heaped tbsp of cacao powder with 1 tbsp of water until it forms a runny paste and fold through the cookie dough with only a few sweeping motions to create a marbled effect.

Spoon mixture onto a lined baking tray and bake at 180oC for 15 minutes. 

Perfect for a not so naughty night time snack!


Immunity tea...

Need a brew to boost the immune system? We all find ourselves run down at this time of year and we just can't afford to get sick, right?
Never fear, lemon, ginger and green antioxidants are here!

Green tea on it's own is full of helpful antioxidants that boost your immune system, so when paired with lemon and ginger extracts  it's perfectly potent in cold and flu fighting vitamins!


I tsp of green tea leaves
A few thin slices of fresh ginger
1 fresh lemon rind

Pop the ingredients into a tea infuser and cover with  up to 3 cups of boiling water. Steep for 5 minutes and enjoy!


 Did you know lemon rind is much more concentrated in vitamins than lemon juice? So don't waste it! Although, if you're not using organic lemons there's a good chance pesticides and other nasty chemical residues still reside on the skins. Rub a little bicarbonate soda over your lemons and rinse thoroughly in warm water to rid them of these toxic nasties!

Friday, 15 November 2013

luscious left overs...

I found this poor little lonely left over chocolate cake in my fridge, the result of having excess cake mixture and not wanting to waste it earlier in the week.


As you can see I don't have very much in my fridge at the moment (understatement of the century), which I'm sure every new home renter/recently moved couple/living out of home first timers experience… so you have to make the most of what you do have!


As I stared at this feeble little feller I couldn't help but notice he was a little dry and in need of a serious pep up, so I enlisted my most recently favoured friend of the chocolate misters kind to help. The raspberry!


After heating 1/2 a cup of frozen raspberries, a teaspoon of white sugar and 1/4 cup of water on high for 2 mins in the microwave, I strained half of the pulp mixture over the cake to moisten it. I then placed the cake in the microwave for 1 min before pouring the remaining pulp mixture over the top.


And there you have a deliciously moist, fluffy, sweet little raspberry and chocolate pudding for 2… or 1 if you can hide it better than I could :)

Sunday, 10 November 2013

Custard Tarts with Raspberries...


I love gooey custard, so much more so when it's paired with crispy pastry and tart berries!


To make:
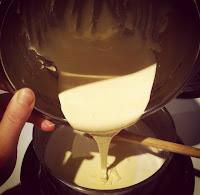
I started by making a custard on the stove, simmering 2 cups of milk with vanilla extract before adding 2 creamed egg yolks with 1/2 cup of white sugar in a saucepan for 10 mins.

Note: Do not let the mixture boil as it may curdle and continue to stir at intervals to ensure it does not burn.


I let the custard stand while I prepared the casing.

I simply layered 3 large sheets of filo pastry, brushing each with a little melted butter as I went, then folded the entire thing in half to create 6 layers. I pleated the pastry into lined pie moulds and blind baked it in a 180oC oven for 10 mins.

I then poured the custard into the pastry moulds and baked for a further 15 mins in the same oven. After this, I left the tarts to chill in the fridge for a while until the top set and the centre gooey.


It was just a matter of topping the tart with some raspberries to finish and brushing with a simple glaze to make those berries shine like rubies… yum yum!

Wednesday, 30 October 2013

Coconut porridge with berries and maple syrup...


Porridge… you either like it or you don't!
My dad is the ultimate porridge chef in my eyes, from 6am buttery-nutmeg bowls when I was 5 to honey-licious brain food as I ran out the door to work, he's the master! After so many years of watching and testing I think I've found my favourite concoction to date...

Coconut porridge with berries and maple syrup.

If you're usually a porridge protester, I guarantee this will change your mind.


Serves 2

Before you go to bed at night, place 1 cup of oats, 1/4 cup of shredded coconut and 1 and 1/2 cups of water in a medium sized saucepan to soak overnight.

In the morning add 1/2 a cup of coconut milk (or cream) to the saucepan and bring to the boil. Once boiling continue to stir the  mixture until it thickens.

Spoon porridge into a serving bowl before topping with berries (frozen or fresh) and drizzling over some maple syrup. The creamy coconut mixed with the tartness of the berries and the sweetness of syrup is a match made in heaven!

Note: Create a smoother texture by using quick oats instead of regular oats. These are also good to use if you haven't had the chance to soak your ingredients overnight.


My dad <3